


Back in university, I was the go-to person in my friend group for presentations. Not because I was some design genius, but because I knew how to make slides look good.
I’d pull eye-catching images from Google, throw in a few quotes, slap a cool font, and boom, it looked impressive. None of us ever thought twice about where those images came from. Honestly, the idea of image copyright wasn’t even on our radar.
It wasn’t until one of our professors casually mentioned during a lecture that “using images without permission is technically theft” that it clicked for me. Wait, what? Theft? I thought the internet was like a free buffet - if it’s there, it’s up for grabs. Turns out, that couldn’t be further from the truth.
That tiny comment from my professor opened up a rabbit hole I never knew existed. I started digging into copyright laws, usage rights, licenses, and fair use - all things I wish someone had explained to me much earlier.
So if you’ve ever wondered what image copyright is, how it works, or why everyone keeps talking about “royalty-free” and “Creative Commons,” you’re in the right place. In this blog, I’ll break it down in a way that’s easy to understand and remember.
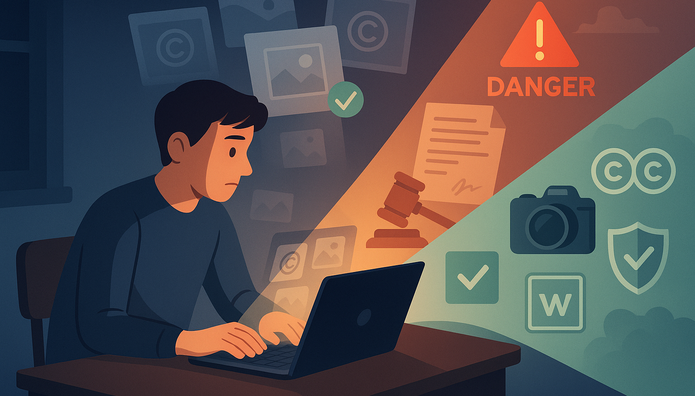
What is image Copyright?
In simple terms, image copyright is the legal right that belongs to the person who created an image. When someone clicks a photo, designs a graphic, or makes any original visual work, they automatically own the copyright to it. They don’t need to fill out a form, pay a fee, or put up a fancy © symbol. It’s theirs by default.
Copyright acts as a protective shield. It gives the creator control over how their image is used. That means they decide whether someone can copy, distribute, modify, or display their work.
If someone uses that image without permission, the creator has every right to take action. This can include asking you to take it down, charging you a fee, or sometimes even suing.
Here’s where most people (including my university self) get it wrong. Just because an image is available online doesn’t mean it is free to use. Google Images isn’t a free-for-all gallery. Most of those images are still protected under copyright laws, whether you downloaded them from a blog, a stock photo site, or stumbled upon them in a random forum.
In short, copyright = ownership + control. If you didn’t create the image, and you don’t have explicit permission to use it, you’re technically violating that creator’s rights.
Why Copyright Matters?
For a long time, I thought copyright only applied to big media companies or professional photographers. But the reality is that it affects anyone who creates or shares content online.
Misusing copyrighted images can lead to serious trouble. You could receive takedown notices, pay fines, or even face legal action. For example, in 2018, multinational retailer H&M was sued by a street artist, Revoke, whose mural was used in an ad campaign without consent.
Beyond the legal risks, it’s also an ethical issue. Every image represents someone’s effort, creativity, and time.
Respecting image copyright isn't optional if you’re building a brand, publishing content, or casually sharing visuals. It’s about protecting yourself and respecting others’ work.
Common Misconceptions About Image Copyright
The more I spoke to people about image copyright, the more I realized how many myths float around. And honestly, I believed most of them myself at one point. So, let’s bust a few of the big ones.
“If it’s on Google, it’s free to use.”
This one’s a classic. Google is a search engine, not an image library. It simply shows you what exists online, it doesn’t mean those images are free or public domain. Most of them are still copyrighted.
“I gave credit, so I’m safe.”
I used to think slapping a “Photo by XYZ” below an image was enough. It’s not. Giving credit doesn’t automatically give you the right to use an image unless the license requires only attribution. You still need permission.
“I’m not making money from it, so it doesn’t matter.”
Copyright still applies whether you’re using an image for commercial purposes or a personal blog. The law doesn’t care if you’re earning from it. Unauthorized use is unauthorized use.
“I edited the image, so now it’s mine.”
Nope. Changing the colors, adding text, cropping - none of that makes the copyright disappear. The original creator still owns the rights unless the license allows modifications.
“It’s an old image, so it’s probably free to use.”
Some images may eventually fall into the public domain, but not all. Copyright can last for decades, sometimes up to 70 years after the creator’s death. So "old" doesn't automatically mean "free."
These myths catch people off guard all the time. Copyright law is very clear, but how we assume it works is usually where the confusion begins.
Types of Image Licenses
Once I started paying attention to image copyright, I quickly realized it’s not black and white. Not every image is locked behind a legal wall. There are different types of licenses; knowing the difference can save you a lot of stress.
1. Royalty-Free
This one confuses a lot of people. Royalty-free doesn’t mean “free of cost.” It means you pay once (or sometimes get it free), and then you can use the image without paying ongoing royalties. But there are still rules - you usually can’t resell it, claim it as your own, or use it in specific sensitive contexts.
2. Rights-Managed
These images come with very specific terms. You pay to use the image based on how, where, and for how long you’ll use it. You'll pay for that specific usage if you want to use it on your website banner for a year. If you want to use it in a print ad later, that’s a separate license.
3. Creative Commons (CC)
This is one of my favorites because it’s clear and flexible. Creators under Creative Commons licenses allow others to use their work under certain conditions. Some CC images require attribution, some allow commercial use, some don’t, and others let you modify the image freely. Always read the license type carefully.
A blogger once downloaded an image from Flickr marked under Creative Commons but forgot to attribute the photographer, leading to a DMCA takedown.
4. Public Domain
These images are free for anyone to use. No copyright, no permission needed, no strings attached. But be careful. Just because a website claims an image is “public domain” doesn’t always mean it is. Double-check.
5. Proprietary Licenses
You can only use these images if you purchase them from the creator or platform. Think of premium stock photo websites. You pay, you get the rights, but those rights are strictly defined in their terms.
How to Safely Use Images Without Breaking Copyright Laws
Once I understood how copyright worked, I became much more careful about the images I used. Honestly, it’s not that hard to stay safe; you just need to follow a few simple rules:-
i) Use your images
Create your visuals. Click your photos, design your graphics, or hire someone to do it for you. When you’re the creator, you own the rights.
ii) Explore free image platforms (but read the fine print)
Many websites offer free-to-use images, such as Unsplash, Pexels, and Pixabay. These platforms usually provide images under a broad license, often free for personal and commercial use without attribution. But always double-check the terms.
iii) Pay for stock images
If you want high-quality, unique images and are willing to spend, stock photo platforms like Shutterstock, Getty Images, or Adobe Stock are solid options. When you buy, you’re purchasing a license, not ownership, but it is legally covered.
iv) Use Creative Commons images (the right way)
If you’re using images under Creative Commons, ensure you understand the specific license. Some allow commercial use, some don’t. Some let you edit, others prohibit it.
v) Always give credit when required
Do it correctly if a license asks for attribution. Mention the creator’s name, the source link, and the license type. It’s not just about ticking a box, it’s about giving credit where it’s due.
vi) Don’t rely on Google image search
If you use Google Images, use the “Usage Rights” filter to look for images labeled for reuse. But even then, click through to the source and verify the license yourself.
vii) Keep records of licenses and permissions
Whether downloading free images or buying stock photos, always keep a copy of the permit or screenshot the terms. If someone questions your usage later, you’ll have proof that you did things by the book.
What happens if you violate the Image Copyright
Let’s talk about the part no one wants to think about - the “what if” scenario. What happens if you use an image without permission?
First, you might get a takedown notice. Platforms like Instagram, YouTube, or your website hosting service can remove your content if the original creator reports you. Sometimes, that’s the end of it but not always.
If the creator decides to take it further, you could face a legal notice or a copyright infringement claim. Depending on how the image was used and whether it caused financial harm, this can lead to hefty fines or legal settlements.
Even if your content doesn’t reach court, its credibility can be damaged. Being publicly called out for copyright violation isn’t a good look, especially if you’re running a business, blog, or creative brand.
5 ways to check image copyright
Back in university, I assumed an image was free to use if it didn’t have a watermark. Now, I know better. If you’re unsure whether an image is copyrighted, here are five practical ways to check:
1. Do a Reverse Image Search
Tools like Google Reverse Image Search or TinEye can help trace an image's origin. If it leads back to a photographer’s website, stock photo platform, or professional portfolio, it’s probably copyrighted.
2. Check metadata
Sometimes, images carry hidden data called EXIF metadata. This includes the creator’s name, copyright information, and licensing details. Tools like Get-Metadata.com allow you to view this information.
3. Look for watermarks or credits
Many creators watermark their work or add a credit line somewhere on the image. If you spot one, that’s your first clue that the image is protected and you need permission to use it.
4. Verify the source website’s license terms
If you found an image on a website or blog, scroll to the footer, “About” page, or image caption. Many sites mention licensing details there. If you can’t find any, assume the image is copyrighted until proven otherwise.
5. Use Google’s “Usage Rights” filter
When searching for images on Google, you can click on Tools > Usage Rights and filter results by “Creative Commons licenses” or “Commercial & other licenses.” It’s not foolproof, but it’s a good starting point.
Taking these extra steps might seem like a hassle, but it’s better than getting into legal trouble later.
How do I copyright my images?
Here’s the best part about copyright: you don’t need to fill out a form or hire a lawyer to own the rights to your images. You automatically hold the copyright when you click a photo, design a graphic, or create an original visual. It’s built into copyright law in most countries.
But you can register your copyright if you want to officially document your ownership (which is smart if you’re a professional photographer, designer, or artist). Here’s how:
1. Register with the copyright office
Most countries have a copyright registration body, like the Indian Copyright Office. You must fill out a form, pay a small fee, and submit your work. Once approved, you get a certificate of registration, which makes it easier to prove ownership in court if needed.
2. Add a copyright notice
While not legally required, adding a simple notice like © [Your Name] [Year] on your images can act as a public statement of ownership and remind others that the image isn’t free to use.
3. Use digital watermarks
Using tools like Photoshop or Lightroom, you can embed a visible or invisible watermark in your images. It won’t stop people from using the image, but it will clarify your authorship.
4. Keep original files and metadata
Always store the original, unedited versions of your images. The EXIF data embedded in these files often includes details like date, time, and device information - all of which can help prove ownership.
The key thing to remember: You don’t need to do anything to “get” copyright. You already have it. But these extra steps make it easier to defend your rights if someone uses your image without permission.
How else can I protect my images?
Copyright law gives you legal protection, but let’s be honest - that alone won’t stop people from downloading or misusing your images. So, what else can you do to protect your work? Here are a few practical strategies I’ve learned over the years:
i) Add a Watermark
Place a small, subtle watermark like your name, logo, or website on your images. It won’t stop everyone, but it will remind people that the image belongs to you. Professional photographers like Peter McKinnon openly discuss watermarking and registering their images to prevent misuse.
ii) Share Low-Resolution Versions
If you post your images online, upload lower-quality versions. This makes them less useful for commercial use without your consent.
iii) Disable Right-Click on Your Website
Use plugins or settings that prevent visitors from easily right-clicking and saving your images. This method is not foolproof but adds a layer of difficulty.
iv) Use Image Tracking Tools
Tools like Pixsy, Digimarc, or even Google Reverse Image Search can help you track where your images are being used without permission.
v) Mention Licensing Terms
If you’re okay with people using your images under certain conditions (like attribution or non-commercial use), make that clear wherever you publish your work.
These steps won’t guarantee that your images will never be misused, but they will make it harder for people to steal your work without consequences.
What should you remember about Image Copyright?
If there’s one thing I’ve learned over the years, it’s that just because something is on the internet doesn’t mean it’s free to use. Image copyright isn’t some boring, technical rule; it’s a creator’s way of protecting time, effort, and creativity.
Whether you’re a content creator, marketer, blogger, or someone who loves posting pretty visuals online, understanding image copyright is non-negotiable.
It keeps you out of legal trouble, helps you respect other creators’ work, and, if you’re a creator yourself, it gives you the tools to protect what’s yours.
The good news is that it’s not complicated once you know the basics. Be mindful of the images you use, check licenses, give credit when needed, and protect your work when you share it.
So next time you’re about to grab an image off Google or social media, pause and ask yourself - Do I have the right to use this? That one question can save you a lot of trouble.
Frequently Asked Questions
Can I use any image I find on Google if I credit the creator?
No. Giving credit doesn’t automatically permit you to use the image. You need to check the image’s license or get explicit permission from the creator.
What happens if I accidentally use a copyrighted image?
If the creator makes a genuine mistake, they might ask you to remove the image or give proper credit. But sometimes, they can send a legal notice or demand compensation.
How do I know if an image is in the public domain?
Public domain images are free to use without permission. You can find them on websites like Wikimedia Commons, Public Domain Archives, or check if the copyright has expired. Always verify the source.
Do I need to register my images to get copyright protection?
No. Copyright protection is automatic as soon as you create an original image. However, registering your copyright can make proving ownership in legal disputes easier.
Can I edit a copyrighted image and use it?
No. Modifying a copyrighted image doesn’t make it yours. You still need permission from the original creator unless the license allows derivative works.
Are all images on free stock photo websites safe to use?
Most images on platforms like Unsplash or Pexels are free for personal and commercial use, but it’s still important to read each platform’s license and any specific restrictions.
How can I protect my images from being stolen online?
You can watermark your images, upload lower-resolution versions, disable right-click on your website, and use image tracking tools to monitor unauthorized usage.


